The Complete Guide to Roof Inspections: Checklist, Costs & Timelines
But what exactly happens during a roof inspection? How much does a roof inspection cost? And how can you ensure your inspector doesn’t miss critical issues? In this complete guide to roof inspections, we’ll explore everything you need to know—from what inspectors look for to how much you should expect to pay, how long the process takes, and how to understand your roof inspection report. We’ve even included a detailed roof inspection checklist you can use to assess your roof’s condition between professional inspections.
The Importance of Regular Roof Inspections
Before diving into the specifics of a roof inspection checklist or costs, it’s important to understand why regular roof inspections are so crucial for homeowners.
Simply put, regular catch minor issues before they escalate into major, costly problems. Many roofing issues begin almost imperceptibly small but can quickly develop into significant damage if left unaddressed. A professional inspector can identify these early warning signs that most homeowners would miss.
These inspections also significantly extend your roof’s lifespan. A typical asphalt shingle roof should last 15-30 years, but without proper maintenance, you might be looking at replacement much sooner than necessary. Regular professional attention keeps small issues from shortening your roof’s functional life.
From a practical standpoint, many homeowners’ insurance policies actually require regular roof maintenance, which includes professional inspections. Failing to maintain inspection records could potentially affect your coverage if you need to file a claim.
Perhaps equally important is the peace of mind that comes from knowing your roof is in good condition. This provides valuable security, especially before storm seasons when your roof will face its toughest challenges. Rather than worrying during every heavy rainfall, you can rest assured that your home is properly protected.
Finally, if you’re planning to sell your home, a recent roof inspection report can increase buyer confidence and potentially your property value. Prospective buyers appreciate documentation showing the roof has been well-maintained, removing one of the biggest concerns in home purchasing.
When to Schedule a Roof Inspection
Most roofing professionals recommend scheduling a professional roof inspection:
- At least once every 1-2 years as preventative maintenance
- After major storms with high winds, hail, or heavy snow
- If you notice interior signs of leaks (water stains, mold, musty odors)
- Before purchasing a new home
- Before selling your current home
- When your roof is approaching the end of its expected lifespan
- If you notice visible exterior damage (missing shingles, sagging areas)
- After nearby construction or tree removal that might have impacted your roof
Your Complete Roof Inspection Checklist
Interior Inspection
- Attic Check (with flashlight):
- Look for light coming through the roof boards
- Check for water stains or discoloration on the underside of the roof
- Inspect for sagging areas in the roof deck
- Check for signs of mold or mildew
- Examine insulation for moisture or compression
- Look for proper ventilation (intake and exhaust vents)
- Check for proper insulation coverage and depth
- Upper Floor Ceiling Check:
- Look for water stains, discoloration, or peeling paint
- Check for cracks or sagging in the ceiling
- Look for mold growth
Exterior Ground-Level Inspection
- Overall Roof Condition:
- Scan for sagging areas
- Look for obvious damage visible from the ground
- Check for algae, moss, or mold growth
- Examine for uniformity of appearance
- Gutters and Downspouts:
- Check for proper attachment to the house
- Look for sagging sections
- Ensure downspouts direct water away from the foundation
- Check for granules from shingles (indicates shingle deterioration)
- Look for proper slope toward downspouts
- Ensure gutters are clear of debris
- Exterior Walls:
- Look for water stains or discoloration
- Check for mold or mildew
- Inspect for damaged or missing siding near roof edges
- Chimney (if applicable):
- Check for cracked or missing mortar
- Inspect flashing around the chimney base
- Look for leaning or other structural issues
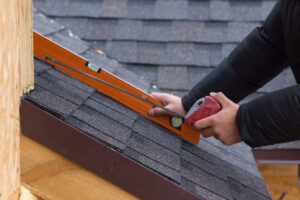
Roof-Level Inspection (if safely accessible)
SAFETY FIRST: Only attempt a roof-level inspection if you have the proper safety equipment and experience. Otherwise, use binoculars from the ground or hire a professional.
- Shingles or Roofing Material:
- Look for missing, cracked, curling, or blistering shingles
- Check for loose, damaged, or missing flashing
- Inspect for excessive granule loss (asphalt shingles)
- Look for rust spots (metal roofing)
- Check for cracked or broken tiles (tile roofing)
- Look for bald spots where granules are missing
- Check for proper shingle overlap
- Roof Penetrations:
- Inspect around vents, pipes, and other penetrations for secure flashing
- Look for cracked boot seals around pipes
- Check for proper sealing around all penetrations
- Roof Valleys:
- Check for damaged or missing flashing
- Look for debris buildup
- Inspect for signs of excessive wear
- Roof Edges:
- Check for secure attachment of drip edge
- Look for signs of water damage or rot
- Inspect for proper shingle overhang
- Vents and Exhaust:
- Ensure all vents are unobstructed
- Check for proper installation and sealing
- Look for damaged or missing vent covers
- Skylights (if applicable):
- Check for cracks in the skylight
- Inspect flashing and seals around skylight
- Look for water stains around the skylight
- Roof Accessories:
- Inspect satellite dishes, antennas, or solar panels for secure attachment
- Check for damage to the roof around mounted accessories
Documentation
After your inspection, be sure to:
- Take dated photos of any issues you find
- Create a written record of your observations
- Compare with previous inspection notes to track changes
- Prioritize repairs based on severity
Remember that a DIY inspection should not replace professional inspections but can help you identify when it’s time to call in an expert.
What’s the Process like for Professional Roof Inspections?
A professional roof inspection is much more thorough than a DIY check and involves specialized knowledge and equipment. Here’s what to expect during a professional roof inspection:
Initial Assessment
- Property Information Gathering:
- Roof age, material, and history
- Previous repairs or replacements
- Known issues or homeowner concerns
- Visual Exterior Inspection from Ground Level:
- Overall roof condition assessment
- Identification of obvious damage or issues
- Examination of gutters, soffits, and fascia
Interior Inspection
- Attic Examination:
- Proper ventilation assessment
- Insulation condition and coverage
- Signs of water infiltration
- Structural integrity check
- Mold or mildew detection
- Air leaks identification
- Upper Floor Inspection:
- Water damage detection
- Signs of roof leaks
- Ceiling condition assessment
Exterior Roof-Level Inspection
- Roofing Material Assessment:
- Condition of shingles, tiles, metal, or other roofing materials
- Signs of wear, damage, or deterioration
- Proper installation verification
- Age-related deterioration assessment
- Granule loss measurement (for asphalt shingles)
- Structural Integrity Check:
- Roof plane examination for sagging or uneven areas
- Deck attachment verification
- Rafter and truss condition assessment
- Flashing and Penetration Inspection:
- Examination of all flashing (chimney, valley, eave, etc.)
- Inspection of all roof penetrations (vents, pipes, skylights)
- Seal integrity verification
- Proper installation confirmation
- Drainage System Assessment:
- Gutter condition and attachment
- Proper slope and drainage
- Downspout placement and condition
- Debris accumulation check
- Specialized Inspections (if needed):
- Infrared scanning for moisture detection
- Core sampling for multiple-layer assessment
- Drone inspection for difficult-to-access areas
Documentation and Reporting
After completing the inspection, a professional inspector will:
- Compile detailed notes on all findings
- Take photographs of problem areas
- Create a comprehensive inspection report
- Provide repair recommendations with priority levels
- Offer cost estimates for necessary repairs
- Discuss findings with the homeowner
Advanced Inspection Technologies
Professional roof inspectors may use various technologies to enhance their assessment:
- Infrared/Thermal Imaging: Detects temperature differences that may indicate moisture infiltration or insulation problems not visible to the naked eye.
- Drone Inspection: Provides detailed aerial views of the roof, especially useful for steep or dangerous roofs.
- Moisture Meters: Measures moisture content in materials to confirm water infiltration.
- Core Sampling: For flat roofs, small samples may be taken to assess all layers of the roofing system.
A professional roof inspection typically takes 1-3 hours, depending on the size and complexity of the job.
What’s Typically Included in a Roofing Inspection Report?
For homeowners who want to document their own roof inspections or professionals looking for a standardized format, here’s a comprehensive roofing inspection report template:
Basic Property Information
- Property Address:
- Property Owner:
- Contact Information:
- Inspection Date:
- Weather Conditions:
- Inspector Name:
- Credentials/License #:
Roof Overview
- Roof Type: (Gable, Hip, Flat, etc.)
- Roofing Material: (Asphalt shingles, tile, metal, etc.)
- Approximate Age:
- Estimated Remaining Lifespan:
- Previous Repairs/Replacements:
- Number of Layers:
- Overall Condition Rating: (Excellent/Good/Fair/Poor/Failed)
Free Resource: Our Roof Inspection Report Template
Commercial roof inspections typically start around $200 for smaller buildings but can exceed $1,000 for large facilities with complex roofing systems. The increased cost reflects the greater complexity, liability, and time required to thoroughly assess commercial structures.
Factors That Influence Roof Inspection Cost
Understanding what affects the price can help you budget appropriately and determine which type of inspection provides the best value for your situation.
Roof Size and Complexity
The square footage of your roof directly impacts inspection costs, as larger roofs require more time to inspect thoroughly. This increased time translates directly into higher labor costs. Beyond simple size, complexity plays a significant role in pricing. Roofs with multiple levels, varied pitches, or unusual architectural features present challenges that require additional time and expertise to properly assess. A simple gable roof on a ranch-style home will cost less to inspect than a complex roof with dormers, multiple chimneys, and varying materials on a Victorian home.
Roof Accessibility
The ease of accessing your roof significantly affects inspection costs. Roofs that are difficult to access often require special equipment or additional safety measures, driving up the price. Very steep roofs necessitate special safety harnesses and precautions that add time and expense to the inspection process. Multi-story buildings present additional challenges, as do roofs with limited access points. Even landscaping can impact costs—properties with mature trees or elaborate landscaping that restricts ladder placement may require specialized equipment or approaches that increase the overall inspection price.
Inspection Technology Used
Modern roof inspections often incorporate various technologies that affect pricing. Standard visual inspection remains the most affordable option but provides less detailed information than more advanced approaches. Drone inspections fall into the mid-range pricing category and offer excellent detailed visual assessment, particularly for difficult-to-access areas.
Infrared or thermal imaging represents a higher cost option but delivers exceptional value by detecting moisture and heat issues that remain completely invisible to the naked eye. For the most precise leak detection, electronic leak detection systems command premium pricing but can pinpoint water intrusion sources with remarkable accuracy, potentially saving thousands in unnecessary repairs targeting the wrong areas.
Geographic Location
Your location significantly influences roof inspection pricing. Labor rates vary widely by region, with urban areas and regions with higher costs of living typically commanding higher inspection rates. A roof inspection in Manhattan will generally cost more than the same service in rural Nebraska, reflecting the difference in overhead costs and prevailing wage rates for skilled professionals in those areas.
Inspector Qualifications
The expertise level of your inspector directly affects pricing. More experienced inspectors with specialized certifications often charge higher rates, but their expertise may provide more accurate and comprehensive assessments that ultimately save you money. A master roof inspector with decades of experience and multiple industry certifications will charge more than a general home inspector with basic roofing knowledge, but the detailed insights and accurate recommendations may prove invaluable in making informed decisions about your roof.
Free Roof Inspections: What to Know
Many roofing companies advertise “free roof inspections,” which naturally sounds appealing to budget-conscious homeowners. While these offers can provide legitimate value, understanding what you’re getting helps set appropriate expectations and make informed decisions.
Free inspections typically come from roofing contractors rather than independent inspectors. This fundamental difference matters because contractors have a natural business interest in finding work. The company offering free inspections is often hoping to secure your business for repairs or replacement, creating a potential conflict of interest in their assessment. This doesn’t necessarily mean they’ll recommend unnecessary work, but it does mean their financial incentives differ from those of a paid independent inspector with no stake in repair work.
The scope of free inspections may differ from paid professional assessments. While some contractors provide thorough evaluations, others might offer more cursory examinations focused primarily on identifying sellable repair opportunities. Most free inspections will include a sales presentation or follow-up, as this represents the company’s opportunity to convert their free service into paying work.
This doesn’t mean free inspections lack value—many reputable roofing companies offer honest, thorough assessments as a way to build relationships and demonstrate expertise. These companies understand that integrity builds long-term business success better than pushing unnecessary work. However, prudent homeowners should remain aware of potential conflicts of interest and consider getting a second opinion before committing to major expenditures based solely on a free inspection.
Is the Cost of a Roof Inspection Worth It?
When weighing how much for a roof inspection, context matters tremendously. Consider that the typical inspection cost represents just a fraction of what you might spend addressing problems that go undetected until they cause significant damage.
Minor roof repairs generally range from $150 to $1,500 depending on the issue and your location. These relatively modest costs address problems caught early through regular inspection. Without early detection, these same issues often develop into major leak situations requiring extensive repairs costing between $1,000 and $3,000—and that doesn’t include potential interior damage to ceilings, insulation, and belongings.
When problems progress beyond the repair stage, partial roof replacement might become necessary, typically costing between $2,000 and $7,000 depending on the affected area and materials used. In worst-case scenarios where comprehensive damage occurs, complete roof replacement runs between $5,000 and $25,000 or more based on home size, roof complexity, and selected materials.
Viewed through this financial lens, investing $150-$600 in a professional roof inspection represents prudent preventative maintenance rather than an optional expense. The early identification of issues before they escalate can save thousands in repair costs and protect your home from the disruption of emergency repairs. Much like regular medical check-ups help prevent serious health conditions, routine roof inspections help maintain your home’s most important protective system at optimal performance.
How Long Does a Roof Inspection Take?
The duration of a roof inspection varies depending on several factors, but understanding typical timeframes helps you plan accordingly.
Average Timeframes
For residential properties:
- Small to medium-sized homes (under 2,000 sq ft): 30 minutes to 1 hour
- Larger homes (2,000-4,000 sq ft): 1-2 hours
- Very large homes (4,000+ sq ft): 2+ hours
For commercial properties:
- Small commercial buildings: 1-2 hours
- Medium commercial buildings: 2-4 hours
- Large commercial facilities: Half-day to full-day process
Factors Affecting Inspection Duration
Several variables can extend how long a roof inspection takes:
Roof Size and Complexity
Larger roofs with multiple sections naturally take longer to inspect thoroughly. Complex architectural features like dormers, skylights, and multiple pitch changes require additional attention.
Accessibility Issues
Difficult-to-access roofs take longer to inspect safely. Factors include:
- Steep pitches requiring careful navigation
- Multi-story heights requiring specialized equipment
- Limited access points
- Obstacles surrounding the property
Extent of Visible Problems
If the inspector discovers issues that warrant closer examination, the inspection will take longer as they document and assess each problem area thoroughly.
Weather Conditions
Poor weather can extend inspection time or necessitate rescheduling:
- Wind can make walking on the roof dangerous
- Rain reduces visibility and can mask certain issues
- Extreme heat or cold may require the inspector to take breaks
Inspection Method
Different inspection approaches affect duration:
- Visual exterior-only inspection: Fastest option
- Exterior plus attic inspection: Adds 15-30 minutes
- Drone-assisted inspection: Can be quicker for large areas but requires setup time
- Thermal imaging inspection: Adds 30-60 minutes for equipment calibration and methodical scanning
Documentation Requirements
More thorough documentation takes additional time:
- Taking detailed photographs of all areas
- Video recording
- Measurements and diagrams
- Detailed notes for comprehensive reporting
What to Expect During the Inspection Process
Understanding the typical process helps set appropriate expectations for how long a roof inspection takes:
- Initial assessment (10-15 minutes): The inspector evaluates the property layout, access points, and safety considerations
- Exterior ground inspection (10-20 minutes): Examining visible roof areas from the ground using binoculars or cameras with zoom capabilities
- Physical roof inspection (20-60 minutes): Careful examination of the roof surface, which may involve walking on accessible areas or using drones for steep or fragile roofs
- Attic/interior inspection (15-30 minutes): Checking for leaks, ventilation issues, and structural concerns from inside
- Documentation (15-30 minutes): Taking photographs, measurements, and notes on conditions found
- Debriefing (10-15 minutes): Discussing findings with the homeowner and explaining next steps
For the most accurate timeline, ask your inspector for an estimated duration when scheduling your appointment.
Understanding Your Roof Inspection Report Template
After completing the inspection, the professional should provide a detailed roof inspection report. Understanding the components of this document helps you interpret the findings and make informed decisions about maintenance and repairs.
Elements of a Professional Roof Inspection Report Template
Understanding what should be included in a comprehensive roofing inspection report template helps you evaluate the quality and thoroughness of the service you’re receiving. A proper report serves as both documentation of current conditions and a roadmap for maintaining your roof’s integrity.
1. Property Information
Every professional report begins with basic identifying information that establishes the context for all findings. This includes the complete property address to confirm the correct property was inspected. The inspection date and time are recorded, along with weather conditions during the inspection, as these factors can affect what the inspector is able to observe. For example, recent rain might reveal active leaks, while bright sunlight might make subtle issues more visible.
The report should include client contact information for future reference and communication. Finally, the inspector’s name and professional credentials establish their qualifications and provide accountability for the assessment. This section creates a permanent record of who conducted the inspection, when, and under what conditions.
2. Roof Overview
This foundational section provides essential context about your specific roofing system. It identifies the roof type and materials used, such as asphalt shingles, metal, tile, or membrane systems. The estimated age of the roof is noted, as this significantly affects expectations about condition and remaining lifespan. The report includes approximate square footage, which helps provide context for repair or replacement cost estimates.
A thorough report documents the number of roofing layers present, as multiple layers can affect performance and future replacement options. Any previous repairs that are visible or known should be noted along with their apparent effectiveness. Finally, this section typically provides an overall condition rating that summarizes the roof’s general state relative to its age and expected lifespan.
3. Findings and Observations
The heart of any inspection report lies in its detailed documentation of specific conditions observed during the inspection. This comprehensive section is typically organized by roof area or component to create a logical structure. It describes the roofing material condition across different sections of the roof, noting variations in wear patterns or damage. The condition of all flashing is documented, as these critical transition areas are common failure points.
A thorough assessment of chimneys and vents is included, along with a detailed evaluation of the entire drainage system including gutters and downspouts. Structural observations document any sagging, warping, or other indicators of potential underlying issues. The report assesses ventilation adequacy, which affects both roof performance and energy efficiency. Findings from the attic inspection complete this section, connecting exterior conditions with any interior manifestations.
For each observation, the report should include a clear description of the condition noted, its precise location on the roof for future reference, and a severity rating that helps prioritize responses. Photographic evidence provides visual confirmation and baseline documentation for future comparisons. Finally, each significant finding should include an explanation of potential consequences if not addressed, helping homeowners understand the implications of various issues.
4. Recommendations
The practical value of an inspection emerges in this section, which transforms observations into actionable guidance. The report should clearly identify immediate repairs needed to address urgent issues that could lead to damage if left unresolved. Beyond urgent matters, maintenance recommendations outline steps to preserve roof condition and extend its lifespan. Future considerations highlight issues that don’t require immediate action but should be monitored or planned for in coming years.
A thorough report includes estimated timeframes for recommended work, helping homeowners plan and budget appropriately. This timeline guidance distinguishes between truly urgent matters requiring immediate attention and maintenance items that can be scheduled more flexibly. Well-structured recommendations provide a clear path forward based on professional assessment of current conditions.
5. Photographic Documentation
Visual evidence forms a critical component of any professional inspection report. High-quality images document overall roof condition from multiple angles, providing a comprehensive visual baseline. Close-up photographs of specific problem areas offer detailed evidence of issues requiring attention. Some reports include comparison images showing normal conditions alongside problematic areas to help homeowners understand the distinctions.
When interior damage exists, photographic documentation connects exterior conditions with their interior consequences. Images of attic conditions complete the picture, showing the underside of the roofing system and any issues visible there. This visual record serves both as current documentation and as a baseline for future comparisons to monitor changes over time.
6. Summary and Conclusion
The report concludes with a synthesis of all findings into an overall assessment of roof health. This includes an estimated remaining lifespan based on current conditions and assuming recommended maintenance is performed. Major concerns are highlighted again for emphasis, ensuring critical issues don’t get lost in the detailed body of the report. Finally, clear next steps are outlined, providing homeowners with concrete guidance on how to proceed based on the inspection findings.
Digital vs. Paper Reports
Modern roof inspection reports are often delivered digitally, offering several advantages:
- Interactive features (clickable images, expandable sections)
- Easier storage and retrieval
- Ability to share with contractors or insurance companies
- Integration with home maintenance software
- Video content inclusion
Making Sense of Technical Terms
Quality roof inspection reports explain technical terms, but some common terminology you might encounter includes:
- Blistering: Bubbles in the shingle surface due to trapped moisture
- Buckling: Waviness or rippling in the roof surface
- Cricket/Saddle: A ridge structure designed to divert water around chimneys or other obstructions
- Drip Edge: Metal flashing installed at roof edges to control water flow
- Ice Dam: Buildup of ice at the roof edge that prevents proper drainage
- Ponding: Standing water on a flat or low-slope roof
- Valley: The internal angle formed by the intersection of two sloping roof planes
- Soffit: The underside of roof overhangs
- Fascia: Vertical finishing edge connected to the ends of rafters and trusses
Using Your Report Effectively
A roof inspection report is more than just documentation—it’s a planning tool:
- Prioritize issues: Address safety concerns and active leaks first
- Budget for repairs: Use the report to estimate upcoming expenses
- Insurance claims: Detailed reports can support damage claims
- Contractor selection: Share the report with potential contractors for more accurate estimates
- Negotiation tool: When buying or selling a home, the report provides objective information for price negotiations
- Maintenance schedule: Create a calendar for recommended maintenance based on the report findings
DIY Roof Inspections Between Professional Assessments
While professional inspections are essential, homeowners can perform basic visual inspections between professional visits using a simplified roof inspection checklist. This helps you catch developing issues early.
What Homeowners Can Safely Assess
From the ground or through windows with a good view of the roof:
- Missing, damaged, or discolored shingles
- Sagging areas or obvious depressions
- Gutter condition and debris accumulation
- Visible flashing damage
- Moss or algae growth
- Debris accumulation in valleys
From the attic with a flashlight:
- Water stains or discoloration
- Daylight visible through roof boards
- Sagging sheathing
- Proper ventilation
- Insulation condition
Safety Considerations for DIY Inspections
- Never walk on a roof unless you have proper training and safety equipment
- Do not use metal ladders near power lines
- Avoid roof inspections during wet, windy, or icy conditions
- Have someone present when using ladders
- Don’t lean ladders against gutters or fascia boards that might not support the weight
When to Call a Professional
Contact a professional immediately if you notice:
- New water stains on ceilings or walls
- Sagging roof sections
- Multiple missing or damaged shingles
- Daylight visible through the roof in the attic
- Significant granule accumulation in gutters
- Loose or damaged flashing around chimneys or vents
Choosing the Right Roof Inspector
Not all roof inspections are equal. The qualifications and approach of your inspector significantly impact the value you receive.
Credentials to Look For
- Licensing appropriate to your state’s requirements
- Insurance (liability and workers’ compensation)
- Certifications from industry organizations like:
- National Roof Certification and Inspection Association (NRCIA)
- International Association of Certified Home Inspectors (InterNACHI)
- Roof Consultants Institute (RCI)
- Manufacturer certifications from major roofing material companies
- Years of experience in the roofing industry
Questions to Ask Before Hiring
- “What specifically does your inspection cover?”
- “Do you physically get on the roof or only inspect from the ground?”
- “Do you check the attic and interior for signs of leaks?”
- “What technology do you use during inspections?”
- “What documentation will I receive after the inspection?”
- “How soon will I receive the inspection report?”
- “Are you a roofing contractor or an independent inspector?”
- “What are your qualifications and experience?”
- “Do you carry insurance for roof inspections?”
- “Can you provide references from previous clients?”
Red Flags to Watch For
- Refuse to provide proof of insurance or licensing
- Offer extremely low prices compared to other quotes
- Promise to “handle everything” with your insurance company
- Pressure you to sign contracts immediately
- Don’t have a physical business address
- Lack online reviews or refuse to provide references
- Won’t provide a detailed written report
- Find an excessive number of problems requiring immediate expensive repairs
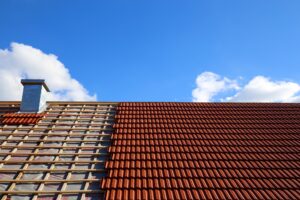
Special Considerations for Different Roof Types
- Granule loss in gutters
- Curling, cupping, or clawing shingles
- Brittle or cracked shingles
- Bald spots where granules have worn away
- Proper sealing of shingle tabs
- Rust or corrosion, especially at seams
- Loose or missing fasteners
- Panel separation
- Scratches or damage to protective coatings
- Proper expansion allowance
- Ponding water
- Membrane punctures or tears
- Blistering or bubbling
- Separation at seams
- Properly functioning drains and scuppers
- Cracked, broken, or sliding tiles
- Deteriorated underlayment beneath tiles
- Properly sealed valley flashing
- Adequate support for the heavy material
- Mold or algae growth between tiles
- Splitting or rotting shakes
- Moss or fungus growth
- Proper spacing between shakes for expansion
- Cupping or warping
- Infestation by insects
Roof Inspections for Real Estate Transactions
Roof inspections take on special significance during property sales:
For Home Buyers
- Request a specialized roof inspection separate from general home inspection
- Use findings to negotiate repairs or price adjustments
- Understand the remaining lifespan of the roof and budget accordingly
- Verify insurance companies will cover the existing roof
- Consider inspection findings in your total cost of ownership calculations
For Home Sellers
- Conduct a pre-listing inspection to identify and address issues proactively
- Provide inspection reports to potential buyers for transparency
- Make strategic repairs that offer the best return on investment
- Understand how the roof’s condition affects your home’s marketability
- Be prepared to negotiate based on buyer’s inspection findings
Wrapping Up: The Value of Regular Roof Inspections
Your roof is one of your home’s most valuable assets, silently protecting everything beneath it from the elements. Regular professional inspections using a comprehensive roof inspection checklist, combined with homeowner vigilance, can:
- Extend your roof’s lifespan by years
- Prevent costly water damage to your home’s interior
- Maintain your home’s structural integrity
- Preserve your property value
- Provide peace of mind during severe weather
While the cost of a roof inspection might seem like an optional expense, it’s actually one of the most cost-effective preventative maintenance investments you can make. By identifying and addressing small issues before they become major problems, you’ll save thousands in potential repair costs and avoid the disruption of emergency roof work.