Try as you might, you can’t make a roof last forever. Eventually, you’ll need to replace it.
If you’re familiar with roof repairs, you may have considered roofing a house on your own. Today, we’re going to teach you how to do it.
Read on for a step-by-step guide on how to roof a home.
Gearing up for the Job
Before you get started, you’ll need a few things—house roofing materials and tools. Here’s a list of the tools that you need:
• Air compressor
• Air hose
• Caulk gun
• Chalk line
• Circular saw
• Extension ladder
• Roof harness
• Roofing nail gun
• Scaffolding
• Stapler
• Straightedge
• Tin snips
• Utility knife
• Hook blades
• Work gloves
Nail Guns: Renting Versus Buying
A decent nail gun will cost between $100 and $300. If you don’t expect to use a nail gun on a daily basis, the cost of renting a nail gun is between $35 a day and $90 a week.
Ideally, in less than a week, you’ll complete the roof. If you have a compressor, renting can prove more cost-effective.
Make Sure to Grab a Hook Blade
A hook blade is a special blade for cutting shingles. It fits in a standard utility knife. It’s not a necessity, but it’ll make cutting the shingles much easier.
Roofing Materials List
You also want to make sure you have all your materials on hand. The material needs for installing a new roof are as follows:
• #15 or #30 felt underlayment
• Drip edge
• Roof nails
• Sealant
• Self-adhesive waterproof underlayment (“ice and water shield”)
• Staples
• Step and dormer flashing
• Valley flashing
• Vent flashing
A couple of pointers about shingles might make your selection easier.
Choosing Your Shingles
You can select between decorative shingles or three-tab shingles for your new roof. Architectural shingles have a textured appearance and are simpler to mount.
They are, however, heavier than the three-tab shingles. They’re a little more pricey, too.
However, all models typically come with 25-to-30-year warranties. In the end, the decision will depend on your tastes and your budget. You might use the existing step and dormer flashing.. However, by installing fresh products, you can guarantee a watertight seal.
However, before you start looking for equipment and supplies, there is something you should remember.
Can You Roof a House by Yourself?
If you read this post, you’re more likely to know your way around the hammer. Even, it’s hard to build a roof.
There’s no sun break. It’s critical that you have enough stamina to do the job.
For example, you’re going to have to do a lot of heavy lifting. Try removing a package of shingles from the nearest hardware supply. If you think you can take all the shingles you need to do your job up to the roof, you’re halfway there.
You must also have the capacity to operate on the roof. The work does not look too bad from the field.
Once you get on the roof, however, you’ll see that it’s quite a long way down to the ground. If you’re still in at this point, you might have what it takes for the job.
Safety Tips for Roofing a House
DIY house roofing will help you save a significant sum of money on the purchase of a new roof. It’s not worth it, though, if you get hurt by why you’re doing the idea. With that in mind, here are a few safety considerations.
If the roof is particularly steep or high, employ a specialist. Falling out of the roof will lead to long-term disability—or even death.
Make sure you’re wearing soft-soled shoes for extra grip. Also, make sure your ladder is rated to support an 80-pound package of shingles plus your body weight.
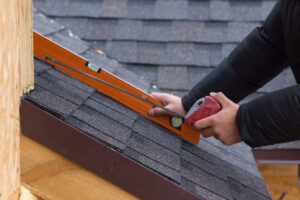
When using your ladder, make sure that it extends at least 3 feet past the edge of your roof. Additionally, use scaffolding for installing the drip edge and the first few rows of shingles.
Prepping Your Roof for the Job
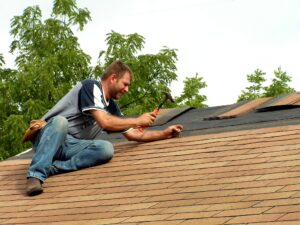
You’ll need to remove your old roof to start the project. This part of the job is called the tear-off. Also, you’ll need to remove all the old nails. If you can’t remove them, at least sink them flat.
Once you’ve cleared away the old roof, you’ll need to install the drip edge. This step is optional. However, it will give your roof a nice finish.
How to Roof a House: Step-by-Step Instructions
In total, you’ll need to complete about 15 steps when installing your roof. The steps are as follows:
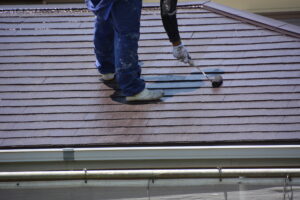
1. Rolling Out the Underlayment
Roll out the self-stick, ice and water underlayment to protect your roof against ice and wind. As you roll role the underlayment, peel off the top half of the plastic backing.
2. Removing the Underlayment Backing
Check to make sure that the underlay is smooth before nailing it to the top lip. Now you can cut the lower half of the back.
Using the underlay instructions and keep working up until you’ve reached the whole side of the roof. Repeat the process on the other side of the roof.
3. Installing the Felt Paper
Next, you’ll unroll the felt paper over the underlayment. Secure the underlayment using plenty of closely grouped staples, especially at the start of each course. Here, you’ll want to use about a dozen stable to secure the felt paper.
4. Use Plenty of Staples
You should staple the felt no more than 12 inches apart. If you don’t use enough staples, the felt may tear, causing you to slip off of the roof.
5. Overlapping the Ridge
When you reach the peak, run the felt paper over and overlap it onto the other side. Repeat this step when you run the felt on the other side of the roof.
6. Flash the Valleys
Install the self-stick underlayment under the metal flashing. If there’s more than one metal valley on your roof, lay the underlayment over both sections.
Then, make sure the underlayment is straight. Now, you can nail the underlayment into place.
7. Flash the Peaks
Cut the flashing back to cover the top of each crease. Now, you should fold the flashing over the top and cut it to fit the self-adhesive underlay.
It’s good to have a helper on this aspect of the work. Cut the underlay to the size of the flashing, then remove the backing.
Now, have your helper hold one end and fold the underlayment in half with the sticky side out. Next, lay the underlay closely in the valley of the folded flashing.
Run the underlayment past the edges of the flashing straight and flat. Now, you can install the flashing.
TIP: Avoid extreme temperatures when installing your roof. If it’s too cold, the shingles won’t stick together.
If it’s too hot, the underlayment will get sticky and hard to manage. Choose an installation date that’s above freezing but below 90-degrees.
8. Install the Starter Shingles
Now, you can run a row of starter shingles one-half inch beyond the drip edge. Make sure that the adhesive bottom faces up. With your nail gun, place the nails two to three inches from the bottom of the eve.
9. Install Ventilation
Your roof may need more ventilation. If so, you can install additional vent holes in the decking with a circular saw. Now, you can install your vent flashing.
10. Treating Vents and Stacks
You will make your plumbing vents leak-proof by treating them with underlay and caulk. Place the underlays across the vent pipes and caulk them with the roof sealant until you lay the shingles. Before you add the vent flashing, though, run the shingles halfway past the vents.
11. Install the Vent Flashing
Now, you can install new vent flashing. Use three nails along the edge of the flashing. Also, install a nail at each one of the lower corners.
12. Laying the Shingles
At this stage, you can follow the manufacturer’s instructions to install the shingles. It’s important to follow the manufacturer’s directions to ensure that the shingles provide the maximum protection for your home. When installing the shingles, make sure to run them long and past the roof edge.
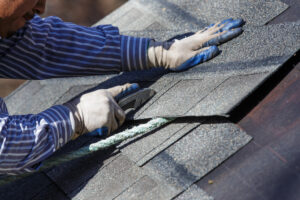
13. Trimming the Shingles
Here, you can use your hook blade to trim the shingles. Run the chalk line as a reference to the cutting.
Now, use your hook blade to trim the shingles and break them off. When you have scraps that are longer than a foot, you should save them to use somewhere. If you’ve trimmed the shingles, you’ll want to add the flashing step and dormer if you plan to go for new products.
14. Finishing off the Vent Flashings
You’re almost home! Here, you want to seal the nail heads and trim around the stack flashing with your hook blade. Now, you can finish laying shingles around the vent flashing.
15. Capping the Ridge
You will finish the job by mounting the ridge. Snap a chalk line and make sure you lay a smooth shingles on the ridge cap.
If it’s a windy day, mount the shingles in such a manner that the wind blows through the overlaps instead of into them. When finished, finish each end of the ridge caps with two nails on each side of the shingle.
Wrapping up the Job
Whew. You made it. Now, you just need to finish off the job.
Before climbing off the roof, sweep away any debris, and seal any exposed nails. If you’ve done a good job, you won’t have to install a new roof again for another 25 to 50 years.
An Expert Roofing Company for the Perfect Installation
Now you know how to roof a house. Believe it or not, this article is only a brief overview of what it takes to install a roof. If it’s not done correctly, you could find that your roof needs repair and as little as a year.
If you want to make sure that your new roof is properly finished, trust the Hulsey Roofing Company to do the job for the first time. We have supported businessmen and homeowners in Missouri for more than 40 years. During that time, we gained a reputation as one of the best roofing companies in Missouri.
Contact Hulsey Roofing Company today at (314) 846-7663 or connect with us online for a fast, free estimate.